Hello Friends! In the past few years, wallpaper has made a roaring comeback. And today’s post shares how to create an easy wallpaper pattern / How to Stencil Paint A Wall With A Cup , using paint.
Easy Patterned Wallpaper Look Using Paint
Truth be told, I added a pattern for the small space behind the refreshment center never thinking that it would be permanent. The basement just seemed to be getting a bit too serious and I thought a small pop of unexpected whimsy would be fun. So I started playing around with some shapes….you know…..just to see. Then, if I like a pattern, I could buy real wallpaper.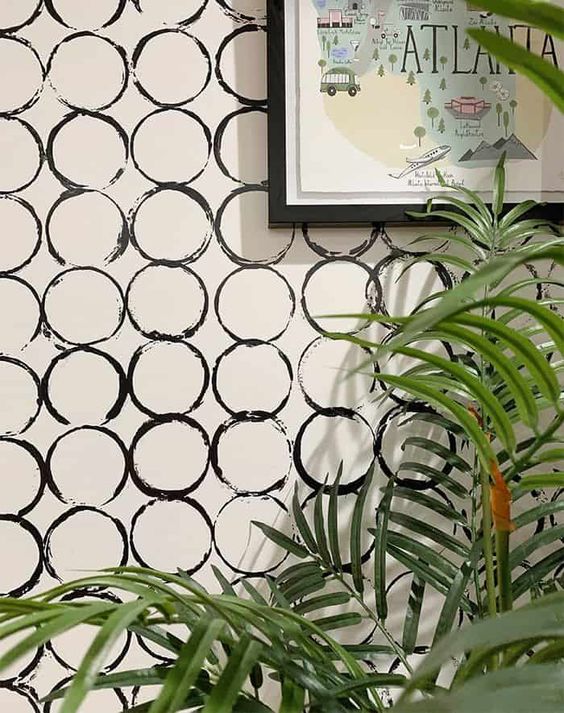
How to Create Patterned Wallpaper Using Paint
And now, I may leave the experimental “paper,” even though it’s quirky and far from perfect. If you’d like to give it a go in one of your spaces, here’s how to make it happen.
Step One: Wall Prep
- To get the ball rolling, sand the wall. The sandpaper grit depends on how bumpy the wall is, but it really helps to get the wall as smooth as possible.
- Then remove the dust using a tack cloth.
- Tack cloths are a bit sticky and pick up this very fine dust better than a vacuum. These are usually found in the paint section at the home improvement store.
- Tape off the area you wish to paint.
- And then apply the base coat of paint.
- When the base coat is thoroughly dry, you’re ready to add the pattern.
Step Two: Choose a Pattern
- Any item that will hold its shape while applying paint can be used, so let your imagination run wild.
- I considered a good many things, like sponges and hand brooms, but settled on circles.
- I think I was feeling all bubbly that day.
- Anyhoo, the item of choice for this pattern is a solo cup.
Step Three: Dip the Top
- Basically, all you do is pour some paint onto a flat surface, like a plastic paper plate, and then dip the rim of the cup into the paint.
- It’s sort of like salting the top of a margarita glass.
- Heavier paint will make thicker circles and add a bit of texture.
- Less paint will do the opposite.
Step Four: Stick and Twist
- To make the circle, touch the cup to the area, lightly press and then twist the cup in place to the right and left.
- My base coat and circle colors are both semigloss and the cup really wanted to slide. So heads up that flat latex paint might be easier to work with if you want a clean and crisp line.
Additional Tips:
- So remember about the paint finish when deciding on colors. I will tell you that my wall has some amazing texture from the black semigloss. You might consider a test using a flat base coat with semigloss for the pattern. The texture on my wall may not be readily visible in the photos, but adds good depth in real life.
- I went over my wall once and then let it dry. Then I went over it again in areas that needed repair. It just takes some trial and error.
- And also remember that no wall is perfectly plumb. If you want a precise pattern that looks more printed, you’ll have to set up a grid on the wall.
- This is easily done by using a level and marking off lines or quadrants with a light pencil or tape.
- Now that I have decided to keep the wall, I wish I had taken the time to create the quadrants. This pattern is a little floaty for my traditional taste, but will be ok in this particular area. ……at least for now.
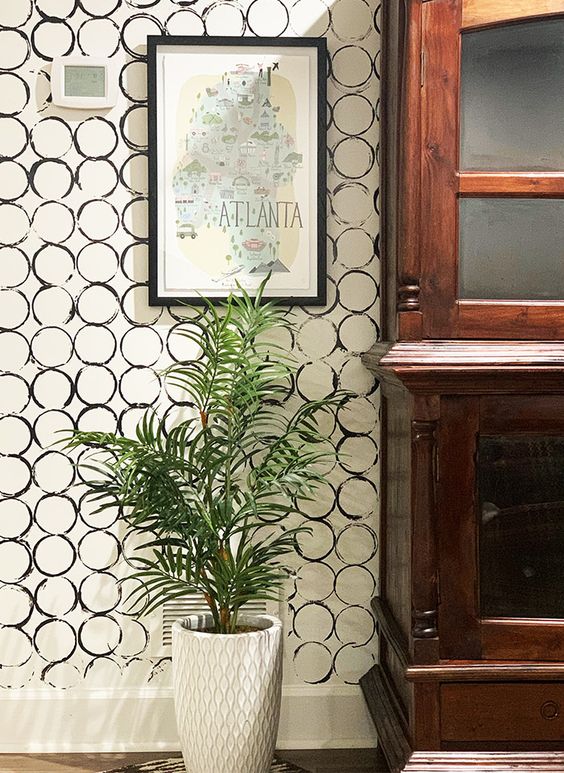
The cabinet is an antique replica that I refinished to use as a bar or refreshment center. This is the natural color of the wood with only one eco-friendly product used to seal and protect. I’ll write a post about how to clean and seal wood such as this very soon. If you are keeping tabs, it’s the eleventh piece I’ve refinished for this challenge.
But for now, let’s celebrate patterned wallpaper on the cheap.
Keep it today….change it tomorrow.
Gotta love it.
To keep this idea for later or share with friends, please PIN the image .
original idea source : craftedbythehunts.com