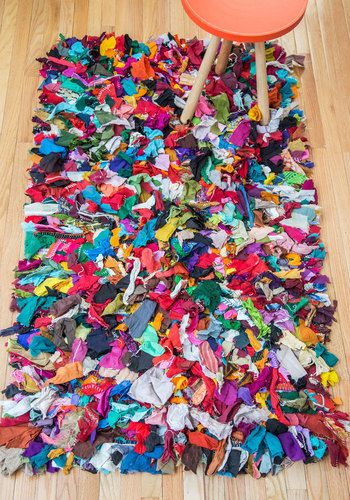
Here is a great tutorial on how to make a t-shirt rug. These type of projects are very time consuming but worth every second you put into. This Week I will be making a rug out of Amelia Decker’s t-shirt scraps that I had left over after making heads and purses and quilts out of her clothes. These rugs take a long time to make it has been a week or two so far but it is almost finished!

My niece passed away a few years ago. She was hit by a car in marked crosswalk. I was fortunate enough to be able to have her clothes. All of her clothes were put to great use. I made quilts, purses, headbands. You name it, I made it ! I thought it was a great way to remember her. I can keep this rug forever. This rug was one of my favorite projects that I made .
I now keep this rug in my daughters nursery.
How to make a No sew t-shirt rug:
Supplies needed :
- A rectangle piece of fabric ( you choose your own size ). I used one of my nieces pillow cases as my piece. This is the backing of the rug.
- Cut up your used or new t- shirts scraps. I used a variety of sizes. Mainly because I kept every scrap of t-shirt that I had from all of my previous projects.
- Take your backing ( the rectangle piece of fabric) and cut even slits throughout the whole backing. Make 1” slits every 1/2” . Start on one side and cut even rows and columns. Make the columns about 1/2” together. The slits do not need to be too big about 1” long, just wide enough to stick your shirt scrap inside of it.

DIY T-shirt rug tutorial
While I was doing this project I found that I needed more slits than what I initially made. So I started cutting more slits at random. It really does not matter where you put the slits because no one is looking at the back of your rug. It is all about the front!
- To make the rug all you need to do is pull your t-shirt scrap through two slits and tie a knot. Keep doing this until your rug is all filled up. When you first start tying the knots you want to fill in all of the available open space.
- As you start to get further along you will notice holes. Inside these holes , just add more t-shirt pieces. I like my rug fuller. It came out a lot better. This rug took me a couple of weeks to make. It is very time consuming but worth it in the end.


I hope you enjoy making your own t-shirt rug. Let me know if you have any questions about making the rug!