Today i will explain how to drill holes In glass – wine bottles , maison jars and More. how Glass bottles are such a versatile medium. You can use them to decorate in so many ways both inside and out. I had a couple projects in mind where I would need to drill a hole into a bottle. Unfortunately, I kept having visions of the glass shattering everywhere and the mess and injuries that I would have to endure. So, I was a little hesitant. But the creative bug bit me and I had to figure out how to do this. It’s actually not as hard or scary as I expected, and with a little practice, I am getting pretty good at drilling through glass. 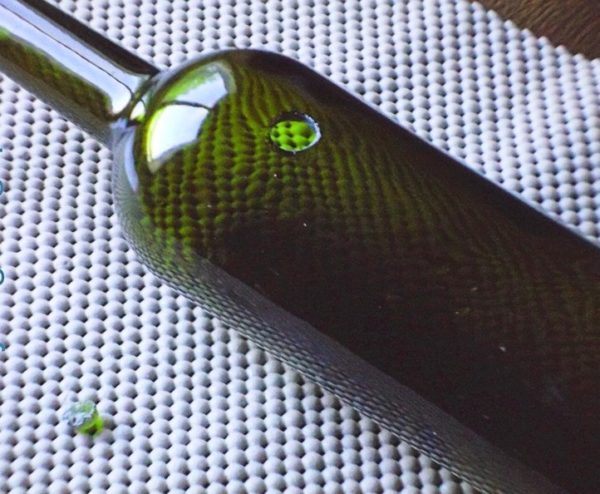
Materials
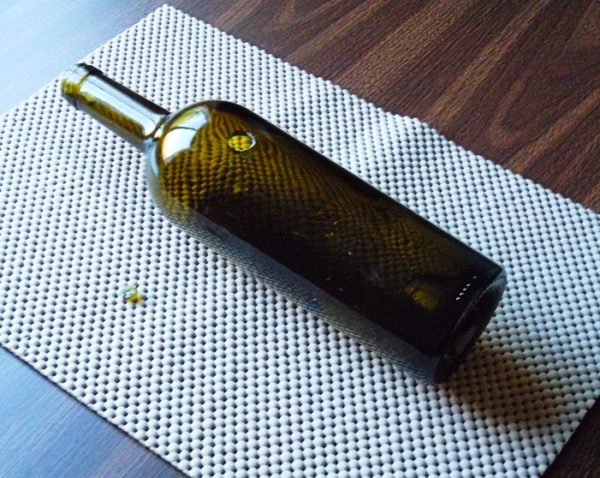
- Clean glass bottle
- Electric drill
- Diamond tip glass drill bit
- Safety glasses
- Spray bottle with water
- Non-slip mat or a small towel
- Packaging Tape
- Painters Tape
- Permanent marker
- Sand paper (optional)
Before you begin, remember to practice common sense safety guidelines. Always wear your safety glasses when drilling glass. It’s also a good idea to wear a long sleeve shirt and pants.
1 ) Start by inserting your drill bit. I used a half inch bit, but diamond bits are available in different sizes. Just check and make sure the bit you are using is designed for drilling glass.
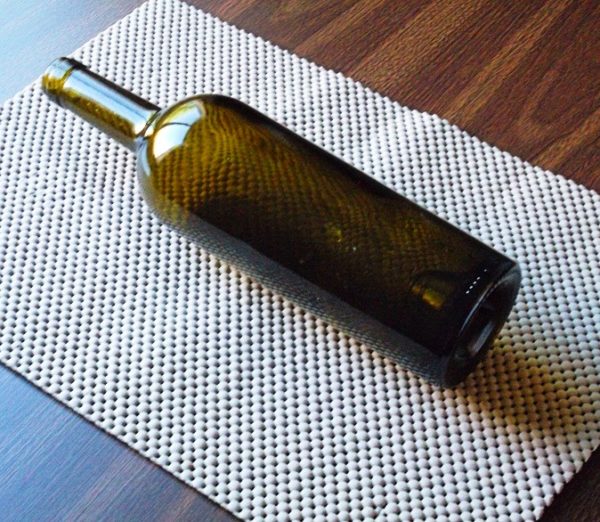
Set up by placing something soft like a towel or non-slip mat (like you might use in a kitchen drawer to keep utensils from sliding) on your work surface. It will help keep the bottle from rolling, absorb some of the pressure from drilling, and collect the small bits of glass dust and debris that are produced when drilling.
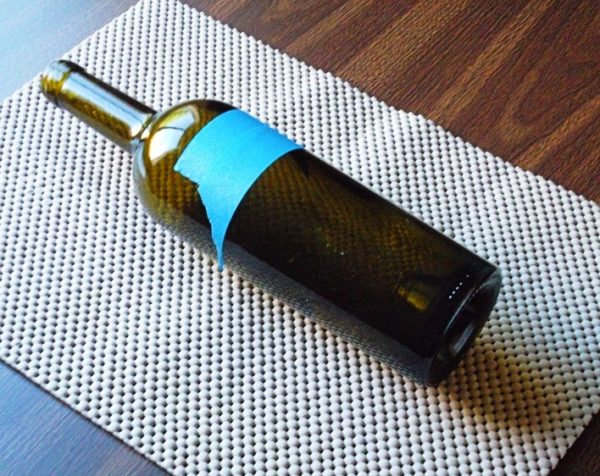
2) Stick a couple small strips of painters tape in the approximate location of where you would like the hole to be placed. Make sure you will not be drilling over the seam of the bottle. I’ve never tried drilling on the seam, but it seems more likely for the bottle to break or shatter if you drill there.
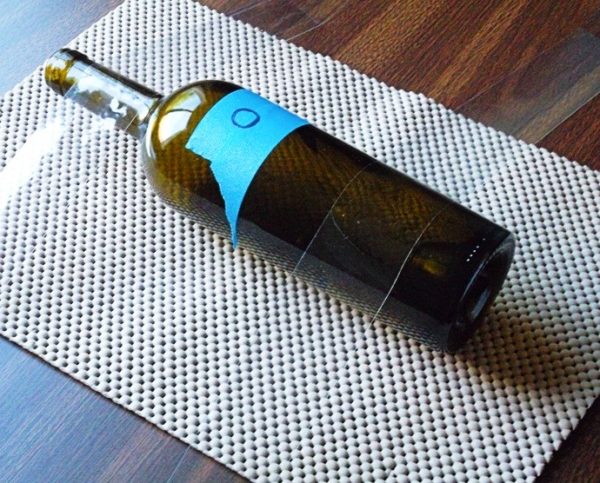
3) With a permanent marker, draw the location of your hole onto the painters tape.
4) Secure the bottle to your work surface with packaging tape. This keeps the bottle from rolling while you drill. I use a piece of tape along the neck of the bottle and a piece across the bottom portion of the bottle. You will be using both hands to work the drill, so you don’t want the bottle rolling around.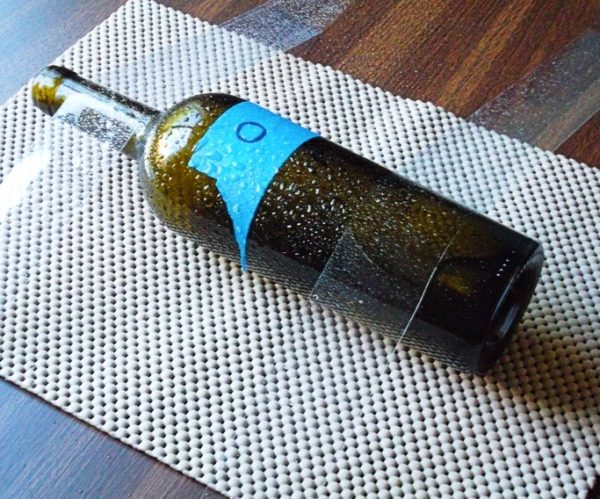
5) Use the spray bottle to mist the area where you will be drilling.
It’s time to drill the hole. Start slow.
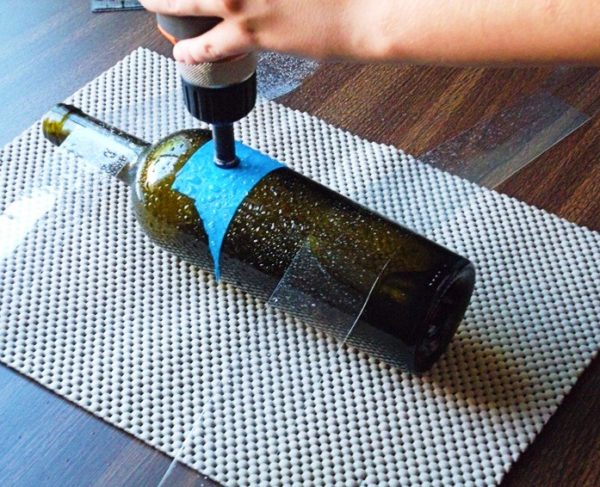
6) With the drill at a slight angle and running at a slow speed begin drilling the lower part of the hole. gradually tip the drill so that the bit is perpendicular to the bottle. I think it works best to have the drill running before it touches the bottle.
7) Once the hole is started, stop the drill, lift it from the surface, and mist the surface with water again. It is important to keep the area where you are drilling wet. Place the drill back into position and continue drilling. You can gradually increase the drill speed. Remember to use light pressure on the drill. You don’t need to press it very hard onto the bottle. It’s okay to stop and mist the bottle if you need to.
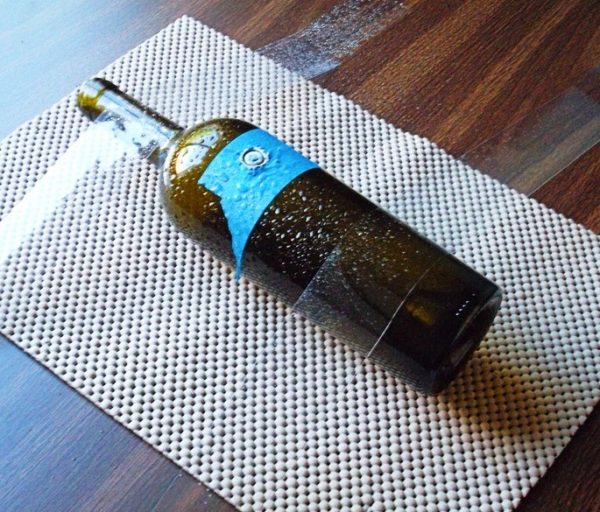
You will be able to tell when you are almost through the bottle by the sound of the bit on the glass. It will start to get more high pitched.
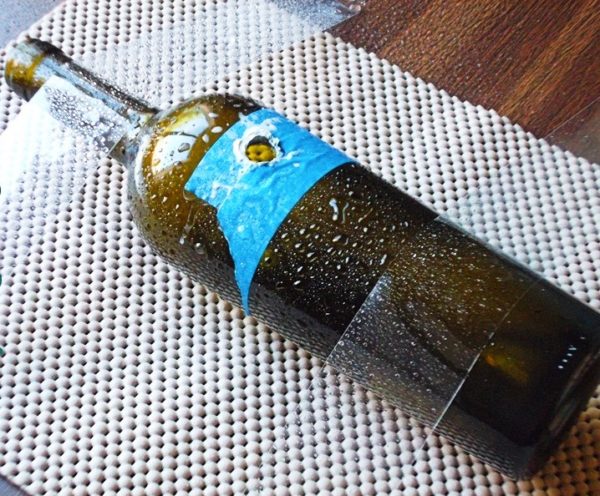
8) After you have completed drilling, you can remove the packaging tape and painters tape. Pour the round piece of glass out of the bottle. Carefully flush the bottle and the area around the hole with water until all the glass dust has been washed away. Use a thick rag to dry around the hole in case any glass bits remain.
9) If you need to, you can use a small piece of sandpaper to smooth the area around the hole.
You can hang a bottle (or three) on the wall to use as a wall vase. But why stop there? Watch for my next post which will be about glass engraving. If you can use a pen, you can engrave glass. You will be surprised at how easy it is to produce a beautifully engraved glass bottle suitable for display on your wall.